This article is aimed at WordPress sites
Steps for tuning Baota panel performance
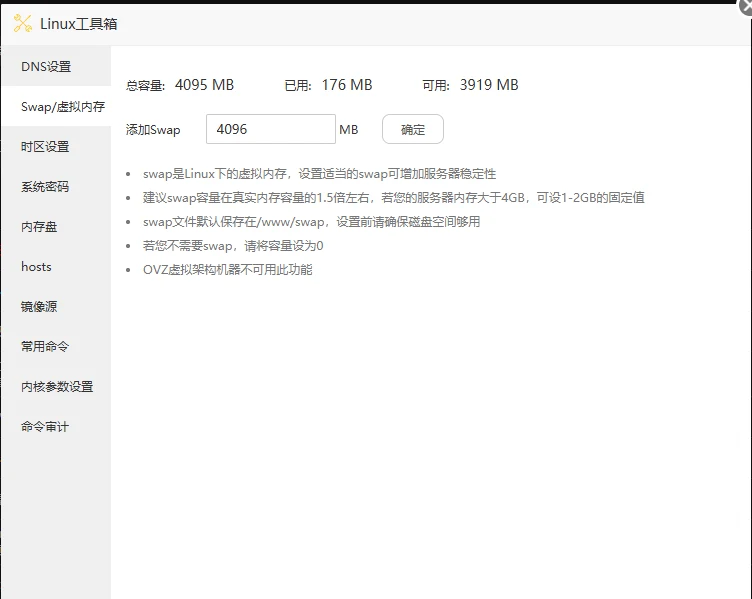
"LinuxToolbox" — start with that.
• Action: open the Linux toolbox -> find Swap/virtual memory.
• Setting: enter 2048 (2GB) or 4096 (4GB), then confirm.
• Why: this is the safety net. When you save complex pages repeatedly in the admin and the 4GB of physical memory fills up in an instant, swap keeps the database and PHP from collapsing.
2. Lift MySQL 5.7's memory limit
MySQL is where a heavy content site chokes first, so give it enough memory to cache data.
• Action: click MySQL 5.7 -> Settings -> Performance tuning.
• Setting:
○ find Optimisation scheme and pick the 2-4GB preset from the dropdown.
○ check the innodb_buffer_pool_size parameter in particular; it should have been raised automatically to 512M or 1024M (if not, set it to 512M by hand).
• Why: so that the vast majority of product queries run in memory instead of crawling to disk.
PHP compiles front-end requests on the fly
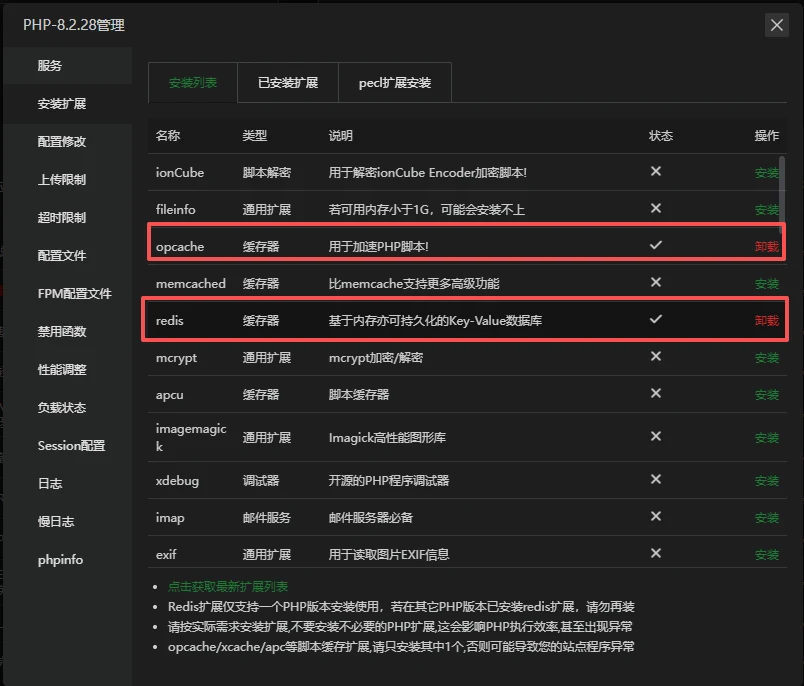
• Step one (install extensions): click PHP 8.2 -> Settings -> Install extensions. Be sure to install opcache and redis (don't skip redis, or the Redis software you installed does nothing).
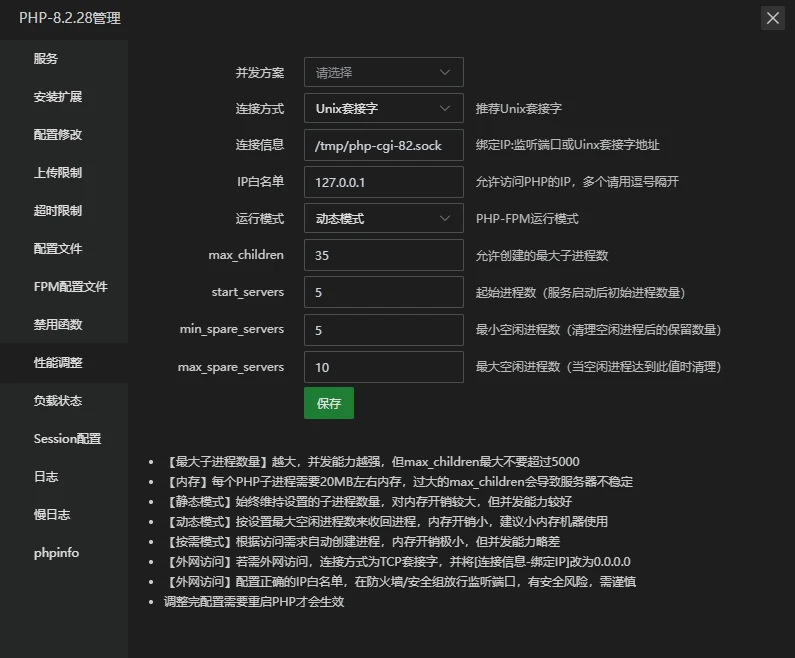
• Step two (tune concurrency): click Performance tuning.
○ Run mode: Dynamic
○ max_children: 40 (the top safety level for the whole server, so that even five sites being busy at once can't drain the 4GB)
○ start_servers: 5
○ min_spare_servers: 5
○ max_spare_servers: 10
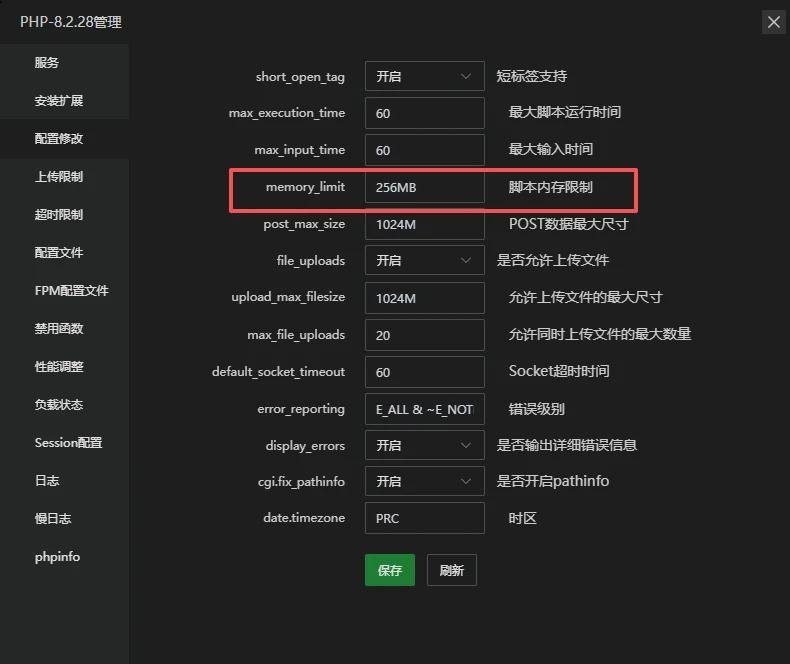
• Step three (more memory): click Config modification. Change memory_limit from the default 128M to 256M.
4. Tuning Nginx configuration (optional, but strongly recommended)
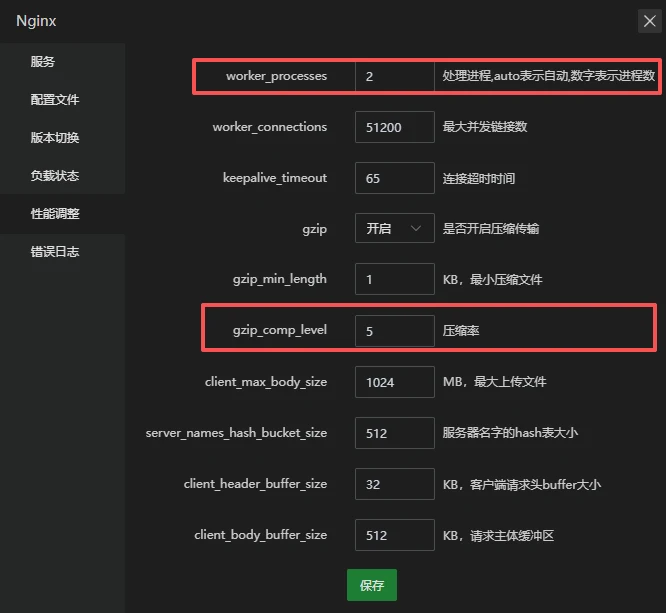
• Action: click Nginx 1.26.3 -> Settings -> Performance tuning.
• Setting: check worker_processes; it can usually be set to 2 (matching your 2 CPU cores), or left on auto. Also make sure Gzip compression is enabled (level 4 or so is enough; higher just eats CPU).
Once the server-level tuning is done, there are two things you must do inside every WordPress site to close the loop:
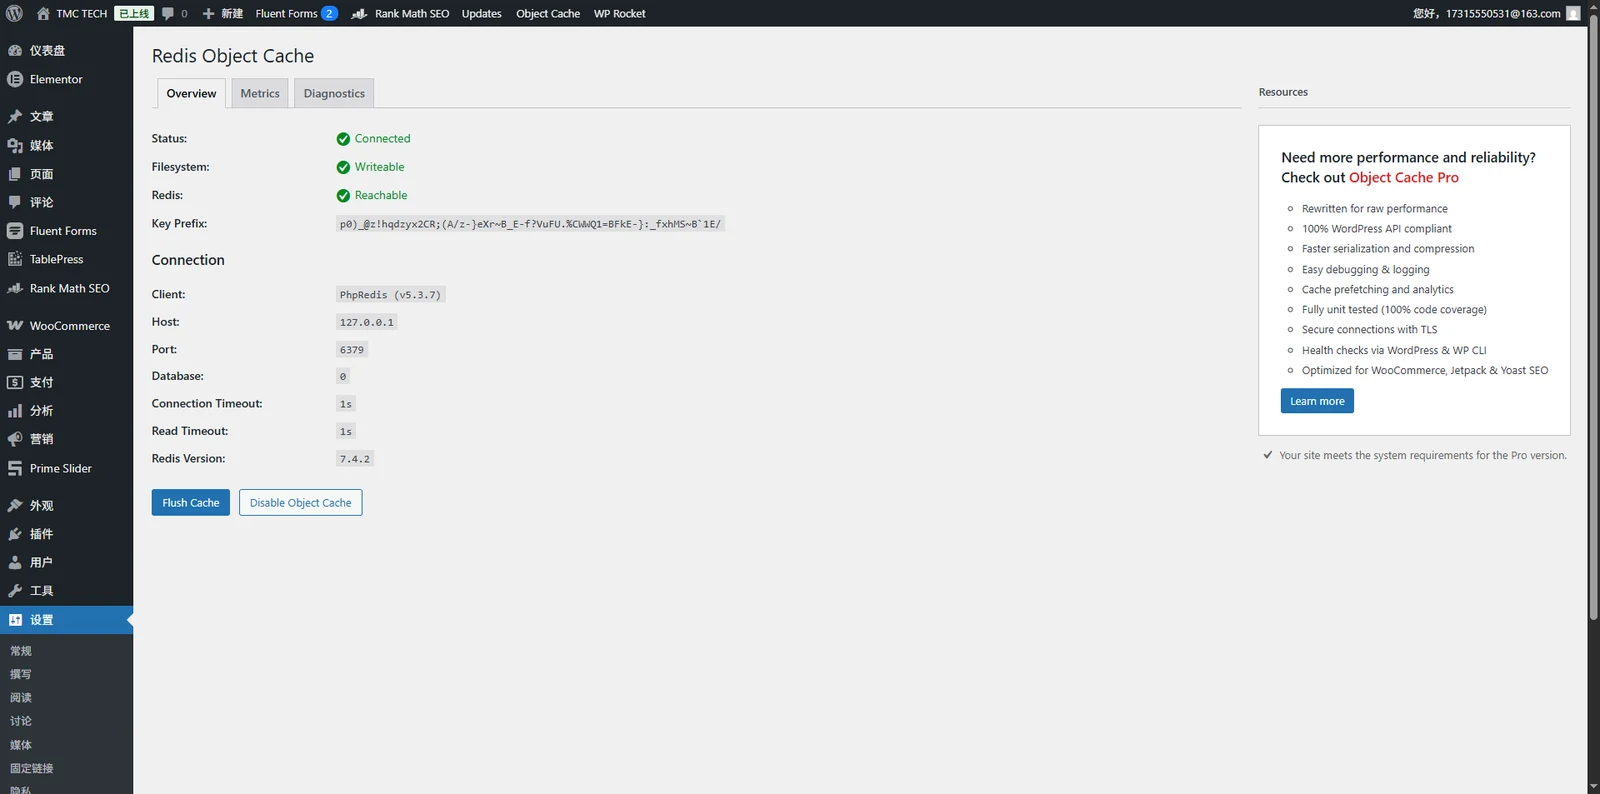
1. Connect Redis as an in-memory database: once Redis is installed, add the Redis Object Cache plugin on each site and turn it on with one click. That sends a huge number of repeated queries to memory and takes a lot of load off MySQL.
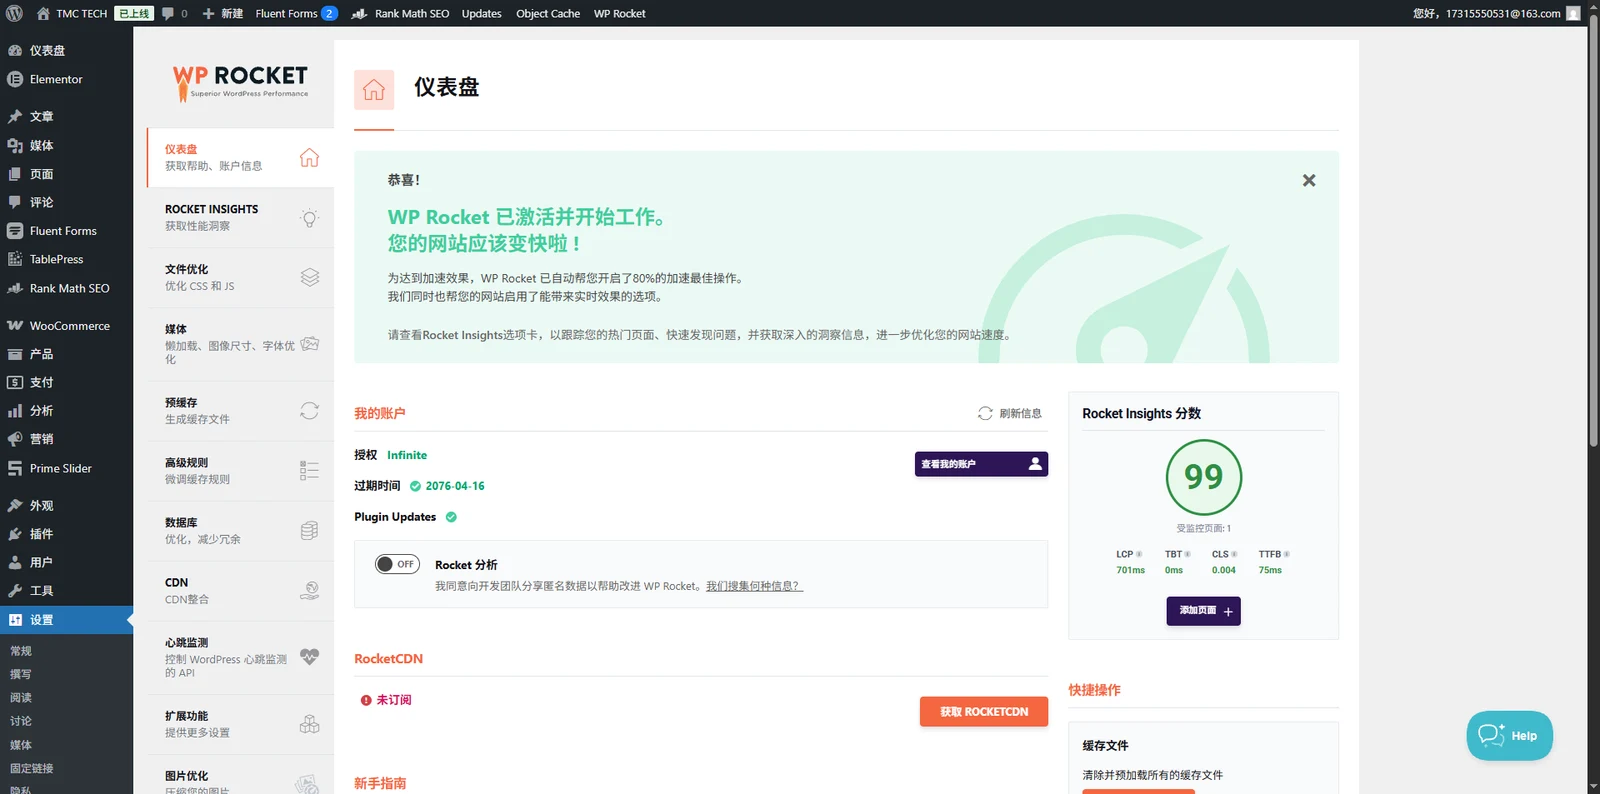
2. Set up full-page static caching: install WP Rocket (or another strong caching plugin) on every site, so that 100% of overseas visitors browsing products never reach PHP or the database.
6. The Redis identifiers a multi-site setup needs
The server hosts 3-5 sites and every one of them has Redis Object Cache enabled, so you must edit wp-config.php and give each site its own Redis database ID or prefix.
• What happens if you don't: by default every site writes its cache into Redis database 0. The result is that site A's frontend may, for no apparent reason, show products from site B — the whole database descends into chaos.
• The fix: add these two lines to the wp-config.php of every site (each site's number must be unique): Site A:
• PHP
|
Plain Text |
• Site B:
• PHP
|
Plain Text |
• and so on. That way Redis keeps every site's data strictly separate, queries stay fast, and they don't interfere with each other.
|
The existing wp-config.php may already contain an auto-generated one |
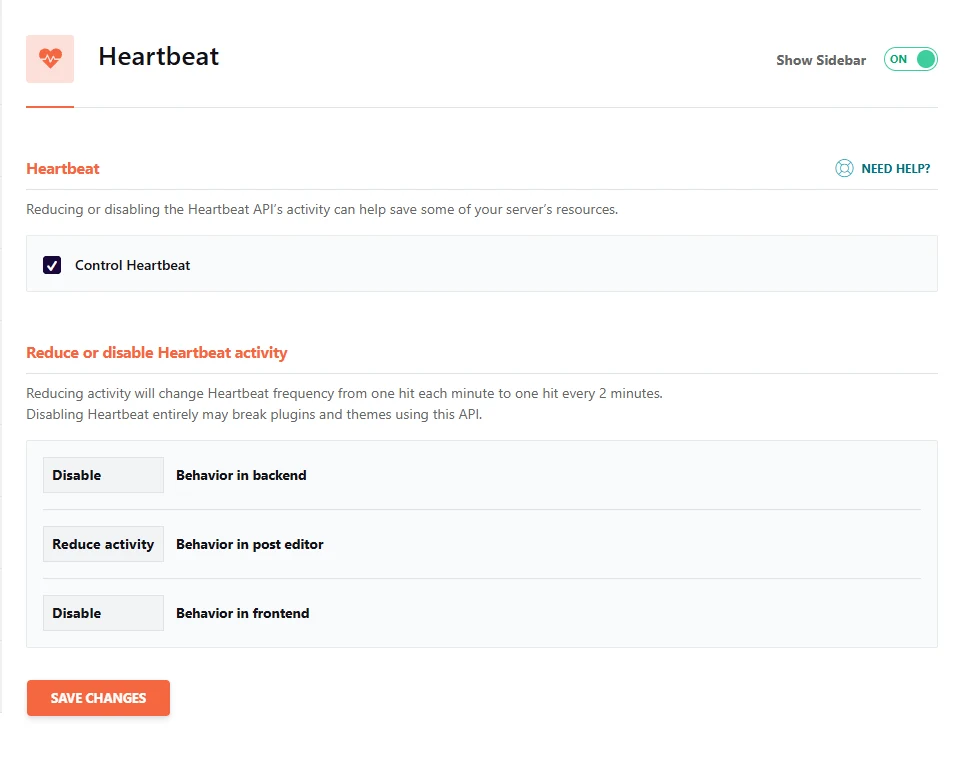
7. Tight control of Heartbeat in WP Rocket
1. Behavior in backend (WordPress admin)
• What happens if you turn it off? your WordPress dashboard stops updating in real time. WooCommerce's live sales figures and plugin notifications stop refreshing automatically; you have to press F5 before they change.
• Effect on the server: if you leave the admin open in the background, disabling this saves a lot of pointless CPU.
• Recommendation: chooseDisable completely (disabled entirely). Nobody sits watching live numbers on a dashboard all day, so disable it and keep the concurrency for something useful.
2. Behavior in post editor (post/page editor)
• What happens if you turn it off? this one has fatal consequences. Heartbeat's core job here is "autosave" and "post locking (so two admins don't overwrite each other)". If you disable it completely and your browser crashes or the network drops while you are laying out a complicated page, hours of work are gone, because nothing was saved automatically.
• Effect on the server: the frequent autosaves while editing really do eat CPU.
• Recommendation: keepReduce activity (reduced activity), which is what your screenshot shows. WP Rocket stretches autosave from every 15 seconds to every 2 minutes. Your work is protected and the pressure on PHP drops sharply.
3. Behavior in frontend (the public site - what visitors see)
• What happens if you turn it off? if your frontend runs a live chat plugin, or a WooCommerce mini cart that depends heavily on AJAX to refresh in real time, disabling it completely can break those features.
• Effect on the server: with a few hundred visitors, each sending one heartbeat request a minute, your 2 cores and 4GB are overwhelmed in an instant (502 errors appear).
• Recommendation: chooseDisable completely (disabled entirely). Since your frontend already has WP Rocket's static cache, visitors have no reason to keep a meaningless "heartbeat" connection to the server. (Note: if disabling it makes WooCommerce adding to the cart stutter, put it back toReduce activity as shown in your screenshot).
8. Mail timeouts and the PHP-FPM avalanche
To stop servers being used to send spam, cloud providers block 25 hard by default.
When a site triggers an email, WordPress's underlying PHPMailer obliviously tries to reach port 25.
Since the port is blocked, the request never goes out and it just sits there waiting to time out.
With 40 concurrent PHP processes, if 40 people trigger an email action at the same moment, all 40 processes hang in a waiting state at once, CPU spikes to 100%, and the whole site locks up with 502 Bad Gateway.
1. Turn it off inside PHP
Cut the mail function out of PHP's configuration so PHP loses the ability to send email at all.
1. open the Baota panel, find App store on the left -> click PHP-8.2 and then Settings.
2. find [Disabled functions] in the left menu.
3. type mail into the box and click Add.
4. click [Services] on the left and restart PHP.
• Effect: anything that tries to call PHP's underlying mail system is blocked instantly with an error, so you never get a "waiting for timeout" that pins the CPU.
2. Intercept it in WordPress's business layer
Disabling the PHP function alone is not always enough: WordPress sometimes still walks through its slow code path before erroring out. As a developer, the cleanest approach is to block it the moment WordPress opens its mouth to send mail.
You can add the line below to functions.php in your current theme (or add it through the Code Snippets plugin):
|
Plain Text |
• Effect: this is a pre-hook provided by WordPress itself. When any plugin (WooCommerce included) tries to send mail, it arrives here, returns false and the flow ends.
Note: if email is disabled completely, clicking"forgot password" on the login screen will not send a reset link and the account is effectively a dead file, so you need some way to send mail. (See theSMTP guide for details.)