This article covers deployment; the usage guide is in the other one.
1. Directus is a real-time API engine and an intuitive admin panel on top of your database
-
Why it suits you so well:
-
It does not hijack your database: it will not mess with your PostgreSQL table structure; your data stays clean and transparent.
-
APIs are generated automatically: once you create the Blog, Product and Message collections in the admin, they are immediately available at /items/blog or /items/product for your React and Vue apps to fetch.
-
The interface is excellent: the admin UI is written in Vue, looks modern, supports Chinese, and could be used directly as an internal company system.
-
Permissions: there is a complete permission system built in — you can say "the frontend may read blogs and create messages, but may not modify products".
-
-
Deployment: one-click deployment with Docker, very light and quick to get running.
- Directus is a standard headless CMS
-
Direct links to the official documentation
-
Official website: https://directus.io/
-
Documentation: https://docs.directus.io/
-
API reference: https://docs.directus.io/reference/introduction.html
-
Front-end SDK: https://docs.directus.io/guides/sdk/getting-started.html
-
2. How to deploy Directus
Here I will use the Baota panel as the example
Step one: open "Container orchestration"
In the top menu of your screenshot, find and click "Container orchestration"
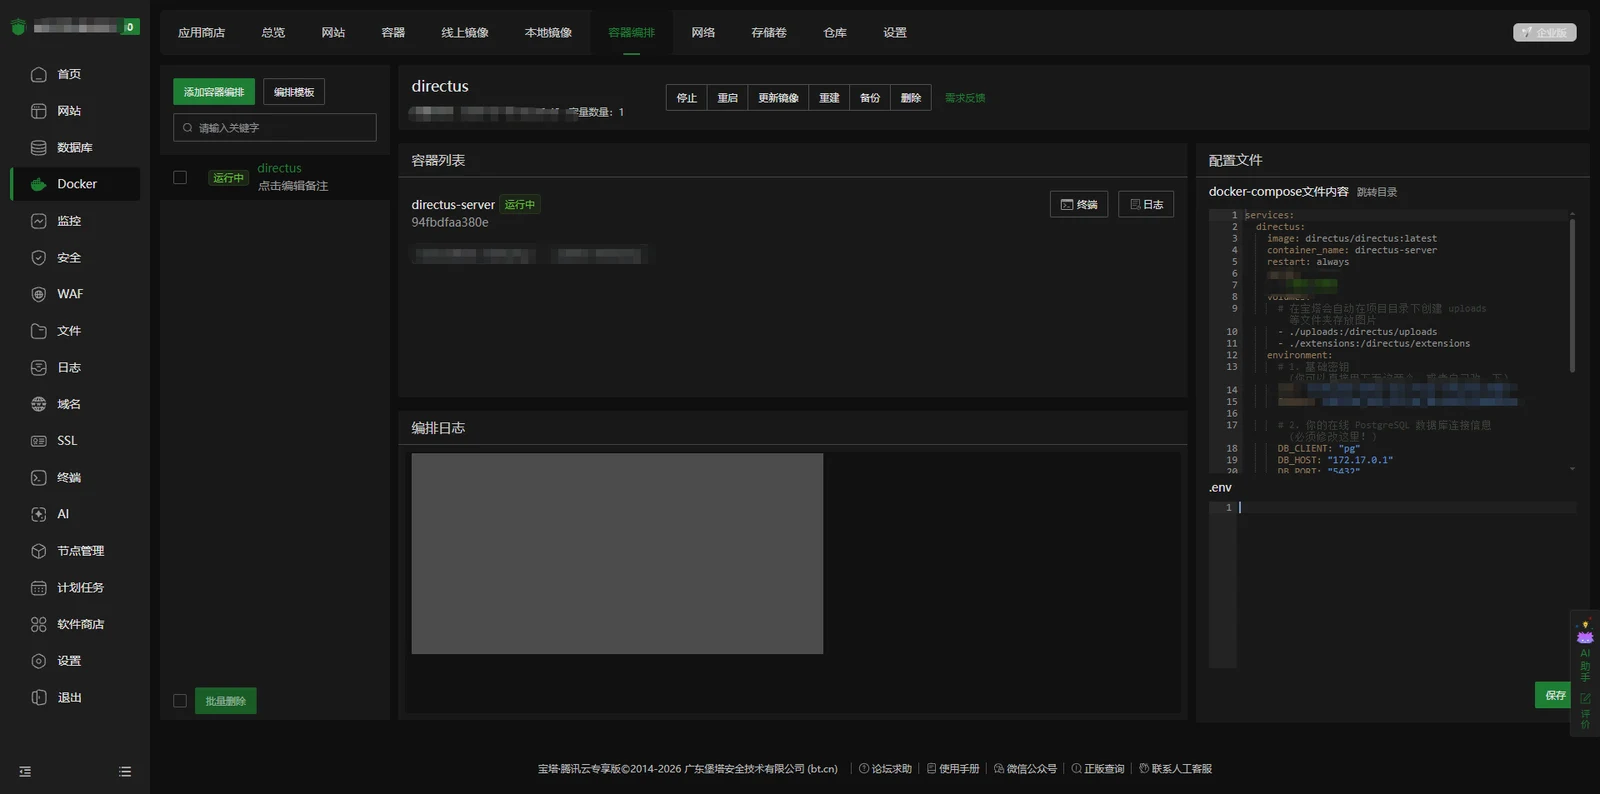
Step two: add a project
-
Once you are on the Container orchestration page, click "Add project".
-
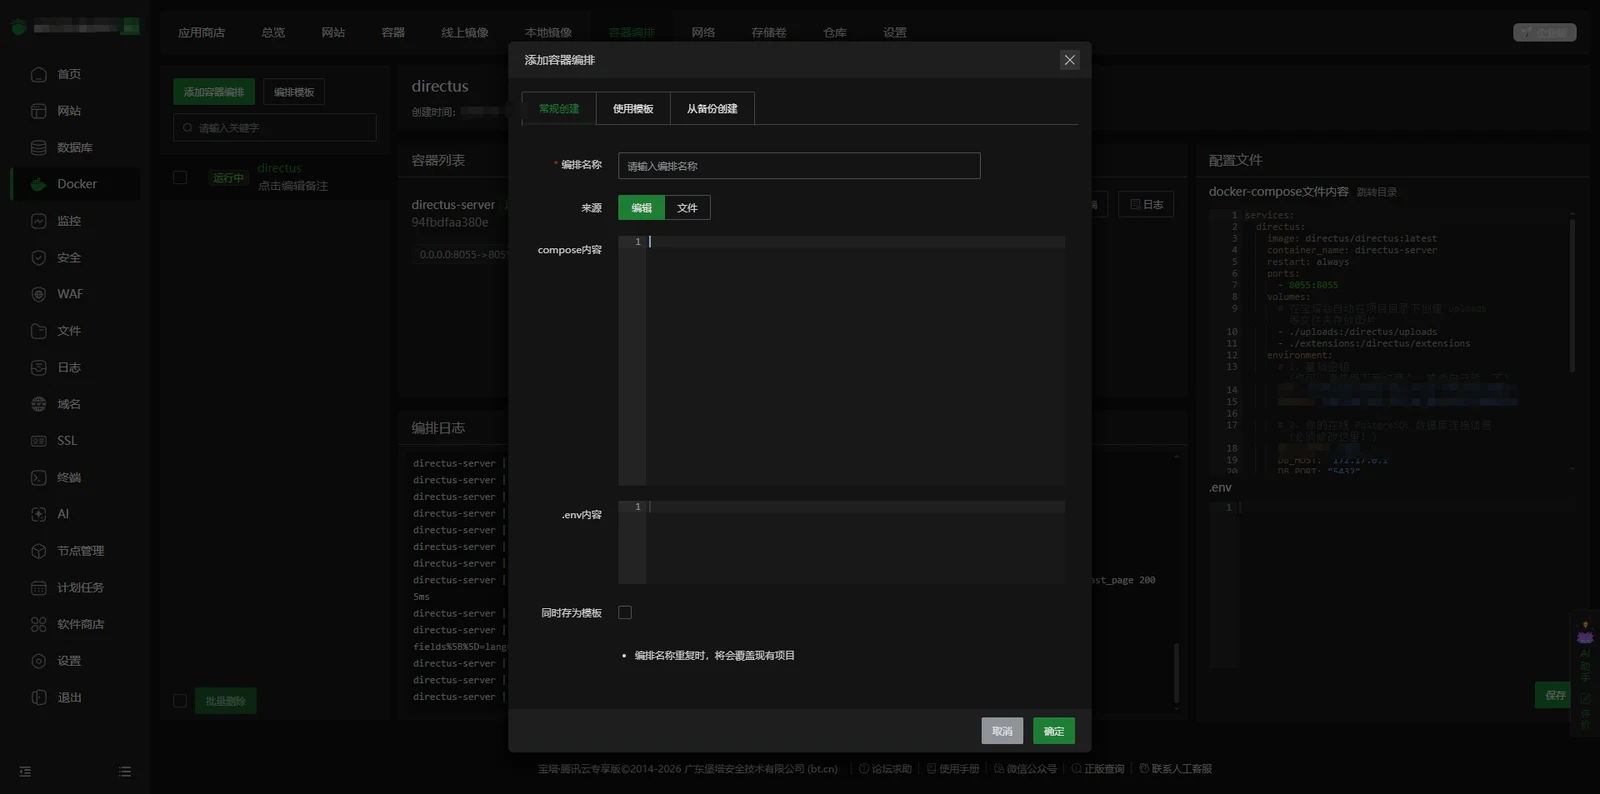
In the dialog that appears:
-
Project name: enter directus (lowercase letters only).
-
Source: choose Content.
-
Step three: paste the configuration file
Copy the code below and paste it into the configuration input box.
version: '3'
services:
  directus:
    image: directus/directus:latest
    container_name: directus-server
    restart: always
    ports:
      - 8055:8055
    volumes:
      # Baota creates folders such as uploads in the project directory to hold images
      - ./uploads:/directus/uploads
      - ./extensions:/directus/extensions
    environment:
      # 1. Base secret (set it yourself, or ask an AI to generate one)
      KEY: "*****************************"
      SECRET: "*****************************"

      # 2. Your online PostgreSQL connection details (you must change this!)
      DB_CLIENT: "pg"
      DB_HOST: "your-database-host"
      DB_PORT: "5432"
      DB_DATABASE: "your-database-name"
      DB_USER: "your-database-user"
      DB_PASSWORD: "your-database-password"
      # DB_SSL: "true" # If your cloud database requires SSL, remove the # in front

      # 3. Super admin account (the account you use to sign in to the Directus admin)
      ADMIN_EMAIL: "admin@yourdomain.com"
      ADMIN_PASSWORD: "your_password_123"

      # 4. CORS settings (so your React and Vue apps can make cross-origin requests)
      CORS_ENABLED: "true"
      CORS_ORIGIN: "*"
Step four: confirm and start
When you are done, click "Confirm" at the bottom.
Baota will start pulling the official Directus image and launching the container. Depending on the server's network, this takes roughly 1-3 minutes.
Step five: open the port (this matters, and beginners forget it)
Directus uses port 8055 by default, and you need to make sure it is open to the outside, or the page will not load.
-
Opening it in the Baota panel:
Click "Security" in the left menu of the Baota panel, enter 8055 in the port allow list, write "Directus" as the remark, then click allow. -
Opening it in the Tencent Cloud console (essential):
Because your server is on Tencent Cloud, you have to log in to the Tencent Cloud web console -> find this lightweight or cloud server -> find "Firewall" (or security group) -> add a rule -> allow TCP 8055.
Why are there two places to open a port?
1. The Tencent Cloud security group opens it to the public internet
2. Baota also controls outside access; it is the "second door". Tencent Cloud is the gate to the compound, Baota is your front door — that is the way to think about it.
Step six: open the admin
Once everything is ready, type this into your browser:
http://your-server-ip:8055
If you see the interface, log in with the ADMIN_EMAIL and the password you set earlier, and you can start creating collections.
3. Logging into Directus
You should see this when you get in
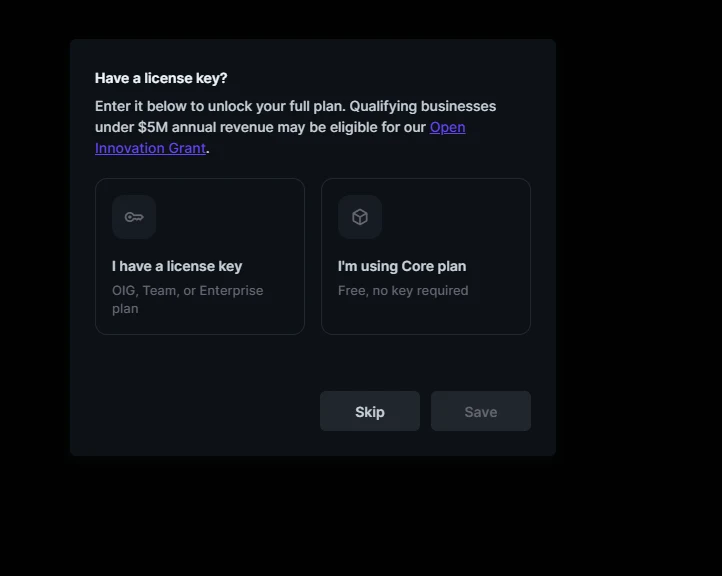
This is Directus's licence confirmation page.
Just click "I'm using Core plan" on the right (free, no key needed).
Then save and you are done
You will land on your login screen; log in as usual.